TAPAS Tutorial 7: 2D Measurements with Analyze Particles
In this tutorial we will learn how to use analysis features of ImageJ within TAPAS. We will learn how to use the analyseParticles module. Please check you understand the basics of TAPAS Input/Output.
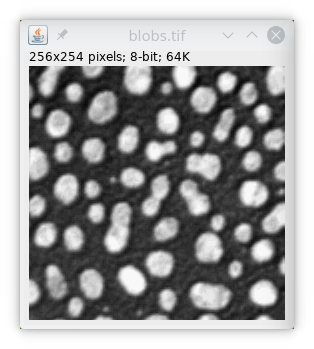
In this tutorial we will use the Blobs image from ImageJ, download it from Open Samples We just removed the inverted look-up table by selecting LookUp Table then Grays.
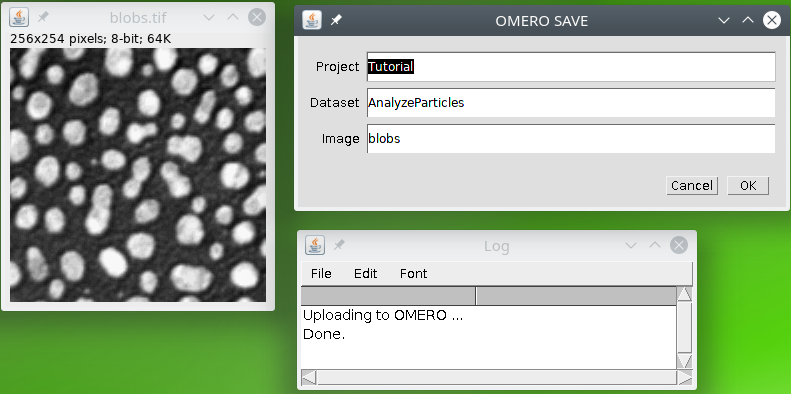
We can upload the data to Omero if you have it, or simply copy the files into our directory structure.
Basic usage
In this tutorial we will learn how to use the AnalyzeParticles module from TAPAS. This module wraps up the functionalities of the Analyze Particles function in ImageJ. This module will take a binary image as input and will output a labeled (a.k.a. segmented), image, where objects are individually identified. A results table file will also be exported.
The first thing to do is to specify which objects are to be detected, we need to specify a minimum and maximum size, as well as a minimum and maximum circularity. The defaults values are 0 for minimum size, infinity for maximum size (actually specified as negative value -1), minimum and maximum values for circularity are 0 and 1. The default values will allow all objects to be detected. You can restrict what kind of objects you want to be detected, e.g. only big objects by setting a minimum size, or only round objects by specifying a minimum circularity.
You need also to specify the measurements you want to perform on the objects as a list of measurements. Available measurements are : area, perimeter, centroid, ellipse (fitting), shape (descriptors) and Feret (diameter).
The code for basic usage is then:
    // Analyze particles, results are saved
    // in a file called results.csv by default
    process:analyzeParticles
    dir:?ij?
    file:?image?-myResults.csv
    list:centroid, ellipse, feret, shape
On our example, before analysis we need to filter the image a bit to homogenize intensities, then apply a threshold. The full code is then :
    // input data
    process:input

    // filter with median filter radius 2 in xy
    process:filters
    radxy:2
    filter:median

    // we threshold the image with Otsu thresholding
    process:autoThreshold
    method:OTSU

    // Analyze particles, results are saved
    // in a file called results.csv by default
    process:analyzeParticles
    dir:?ij?
    file:?image?-myResults.csv
    list:centroid, ellipse, feret, shape

    // to check the results of previous module
    // we simply display the image
    process:show
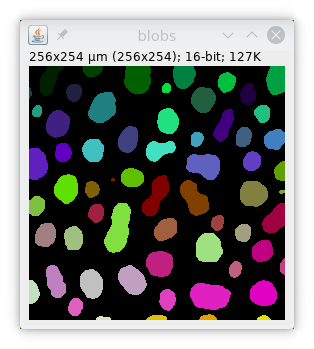
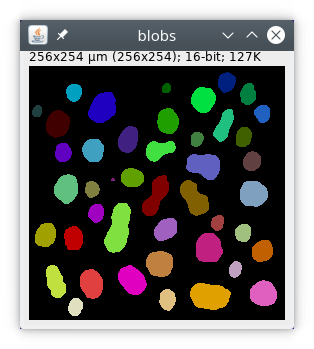
We then obtain the following labeled image :
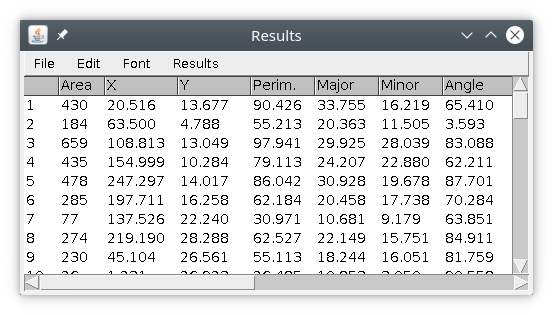
and the following results table :
Advanced usage
We can also use the parameter excludeEdges:yes to remove particles touching the edges.
The code to remove particles on edges is then:
    // Analyze particles, results are saved
    // in a file called results.csv by default
    process:analyzeParticles
    dir:?ij?
    file:?image?-myResults.csv
    excludeEdges:yes
    list:centroid, ellipse, feret, shape
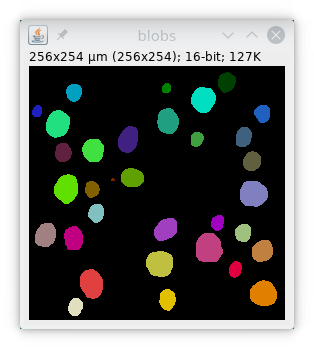
We obtained this segmented images where particles touching the edges of the image are removed :
Here a simple example where we keep only bigger round particles, by specifying a minimum circularity of 0.9 and a minimum size of 10. By default, sizes are in pixels, if you want to specify sizes in unit just add the parameter unit:yes.
    process:analyzeParticles
    dir:?home?
    excludeEdges:yes
    minSize:10
    minCirc:0.9
    list:centroid, ellipse, feret, shape
    dir:?ij?
    file:?image?-myResults.csv
Saving the results
We will finally save the results of segmentation and measurements in the Omero database or in the same folder as the input if you do not have Omero. We will then use two output commands to save the segmented image, and attach to link the measurements results file to the original image. We will also delete the temporary results file using the command delete.
    // output the segmented image
    process:output
    name:?image?-seg

    // attach the results file
    // to the original image
    process:attach
    dir:?home?
    file:?image?-myResults.csv

    // delete temporary results file
    process:delete
    dir:?home?
    file:?image?-myResults.csv
The full code is then:
    // input, filter and thresholding
    process:input
    process:filters
    radxy:2
    filter:median
    process:autoThreshold
    method:OTSU

    // segmentation and measurements
    process:analyzeParticles
    dir:?home?
    file:?image?-myResults.csv
    list:centroid,ellipse,feret,shape

    // output and delete temporary file
    process:output
    name:?image?-seg
    process:attach
    dir:?home?
    file:image?-myResults.csv
    process:delete
    dir:?home?
    file:image?-myResults.csv